How to deploy Backstage on AWS with Terraform
Use Terraform to easily deploy and manage your Backstage application on AWS
Disclaimer: Our Tech Blog is a showcase of the amazing talent and personal interests of our team. While the content is reviewed for accuracy, each article is a personal expression of their interests and reflects their unique style. Welcome to our playground!
Introduction
Hi everyone, today I’m going to show you how to deploy a Backstage application to AWS with Terraform.
If you’re here, I bet you already know what Backstage is but let me spend a few words about it for those who still don’t know. It is an open platform, developed by Spotify, which enhances the developer experience by bringing code, standards and documentation to a centralized place and speeding up their workflow. It also helps to manage CI/CD infrastructure and environments and can be customized to suit your needs with a set of plugins available in the official marketplace.
For this tutorial I’ve taken inspiration from an article that I found while working on a project with Backstage on AWS. Compared to the article however, I needed a clearly defined infrastructure that could be replicated across multiple environments and could be easily managed. For these reasons I chose to use Terraform, a software that allows you to create, manage and replicate cloud and in-house infrastructures. So I’ve decided to share the results of our work hoping that they will be useful to others.
So let’s get started!
Prerequisites
Before we start, let’s make sure we meet these requirements:
- Docker (and Docker compose) installed and running on your local machine
- AWS account and IAM user with full permissions
- AWS CLI set up locally with your credentials
- A basic knowledge of Terraform
Project build
For this tutorial I’ve prepared a repository with everything we need, it contains an instance of Backstage (created with @backstage/create-app) and the files needed to run Terraform. It also defines two Docker containers for local development, the first is the Backstage container and the other is a PostgreSQL instance for the local database.
After cloning the repository, the first step is to create an .env file from the .env.template file. Here we put all the environment variables we will need later:
- AWS credentials
- AWS_ACCESS_KEY_ID
- AWS_SECRET_ACCESS_KEY
- BUCKET_NAME: the name of the bucket for techdocs
- GITHUB_TOKEN: your Github token to allow Backstage to connect to your repositories
- your Github Oauth app for Backstage authentication:
- AUTH_GITHUB_CLIENT_ID
- AUTH_GITHUB_CLIENT_SECRET
We must also enter the same values for some variables that Terraform will need:
TF_VAR_github_token=
TF_VAR_github_client_id=
TF_VAR_github_client_secret=
TF_VAR_access_key_id=
TF_VAR_secret_access_key=
Then we can build the project by launching:
make
As soon as the build finishes, we’ll be able to see the local Backstage instance by visiting this url http://localhost:3000
Backstage build
Now we can take care of preparing the Docker image we’re going to deploy on AWS, so let’s take a look at the Backstage configuration. The file that contains all the configuration needed for the application to work (from database connection parameters to AWS credentials for S3 storage) is app-config.yaml. In the file we can see how all the values of these parameters are indicated as environment variables, for example those for the database:
database:
  client: pg
  connection:
    host: ${POSTGRES_HOST}
    port: ${POSTGRES_PORT}
    user: ${POSTGRES_USER}
    password: ${POSTGRES_PASSWORD}
We will define these variables on the AWS Parameter Store and then inject them into the ECS container. Since there is nothing else to configure, we can run this command to build and tag the Docker image:
docker build . -f packages/backend/Dockerfile --tag {{AWS_ACCOUNT_ID}}.dkr.ecr.eu-west-1.amazonaws.com/backstage-image:1.0.0
the placeholder {{AWS_ACCOUNT_ID}} is the only part we’ll have to change, setting our AWS account ID
After this, we can move on to the Terraform configuration.
Setup Terraform
In the terraform folder we find all Terraform related files, the main ones are these:
main.tf
terraform.tf
terraform.tfvars
variables.tf
What we’re interested in now is the terraform.tf file, where the Terraform providers are configured and where the state of the infrastructure is stored. For this tutorial, the state will be stored on an S3 bucket, so we need to create it manually. After creating the bucket, we need to open the file and enter its name instead of the placeholder {BUCKET-NAME}}:
terraform {
  required_version = "~> 1.0.2"

  backend "s3" {
    bucket = "{{BUCKET-NAME}}"
    key    = "tf-state.json"
    region = "eu-west-1"
    workspace_key_prefix = "environment"
  }

  required_providers {
    aws = {
      source  = "hashicorp/aws"
      version = "3.44.0"
    }
  }
}
That wraps up the Terraform setup, but before we move on to the various modules, let’s take a look at the other files in this directory. The terraform.tfvars file contains some variables that will be used by Terraform, such as the project name, the region we’ll use, and the CIDR block for the VPC and the subnets we’ll create:
project = "backstage"
default_region = "eu-west-1"
vpc_cidr_block = "172.31.0.0/16"
public_subnets = {
  "eu-west-1a" = "172.31.0.0/20",
  "eu-west-1b" = "172.31.16.0/20"
}
The main.tf file, on the other hand, is where the infrastructure modules and resources are defined. However, we’ll see part of the content by analyzing the first module in the next section.
VPC module
The first module is the VPC module where we will deploy all the resources. It is defined in the main.tf file like this:
module "aws_vpc" {
  source         = "./modules/vpc"
  project        = var.project
  vpc_cidr_block = var.vpc_cidr_block
  public_subnets = var.public_subnets
}
Basically, the only thing required is to provide Terraform with the module path (in this case ./modules/vpc) and the variables that the various resources will use.
For the next modules we will avoid stating their definition, as it’s very similar to this one, and get straight to the point by talking about resources.
At this point let’s look at the content of the module in which we’re going to define:
- one VPC:
resource "aws_vpc" "backstage_vpc" { cidr_block = var.vpc_cidr_block enable_dns_support = true enable_dns_hostnames = true enable_classiclink = false instance_tenancy = "default" tags = { Name = "${var.project}-vpc" } } - two subnets:
resource "aws_subnet" "public_subnets" { for_each = var.public_subnets vpc_id = aws_vpc.backstage_vpc.id cidr_block = each.value map_public_ip_on_launch = true availability_zone = each.key tags = { Name = "${var.project}-public-subnet-${each.key}" } } - one internet gateway:
resource "aws_internet_gateway" "backstage_igw" { vpc_id = aws_vpc.backstage_vpc.id tags = { Name = "${var.project}-igw" } } - and one route table:
resource "aws_route_table" "backstage_public_crt" {
  vpc_id = aws_vpc.backstage_vpc.id
  route {
    cidr_block = "0.0.0.0/0"
    gateway_id = aws_internet_gateway.backstage_igw.id
  }
  tags = {
    Name = "${var.project}-public-crt"
  }
}
The last step is to associate the route table we have defined to each subnet:
resource "aws_route_table_association" "public_route"{
  for_each = aws_subnet.public_subnets
  subnet_id = each.value.id
  route_table_id = aws_route_table.backstage_public_crt.id
}
We can also see that this module includes an output.tf file. The content is quite simple, basically we define some output variables that will be used by other modules by taking values from the resources we have just defined.
output vpc_id {
  value = aws_vpc.backstage_vpc.id
}

output security_group_id {
  value = aws_vpc.backstage_vpc.default_security_group_id
}

output public_subnets {
  value = {
    for subnet in aws_subnet.public_subnets:
      subnet.availability_zone => subnet.id
  }
}
This output file will also be present in other modules, because some services of the infrastructure obviously depend on others.
ALB module
In this module we’re going to create the Load Balancer and other necessary resources, let’s see them in detail. First we define the security group that will allow traffic to the application on port 80 (in this tutorial we won’t use a custom domain and enable HTTPS):
resource "aws_security_group" "default_sg" {
  name        = "${var.project}-sg"
  description = "Allow traffic to application"
  vpc_id      = var.vpc_id

  ingress {
    from_port = 0
    to_port   = 0
    protocol  = -1
    self      = true
  }

  ingress {
    description = "Allow HTTP traffic to application"
    from_port   = 80
    to_port     = 80
    protocol    = "tcp"
    cidr_blocks = ["0.0.0.0/0"]
  }

  egress {
    from_port   = 0
    to_port     = 0
    protocol    = -1
    cidr_blocks = ["0.0.0.0/0"]
  }
}
Then we define the load balancer:
resource "aws_alb" "default_alb" {
  name                       = "${var.project}-alb"
  internal                   = false
  load_balancer_type         = "application"
  security_groups            = [aws_security_group.default_sg.id]
  subnets                    = var.subnet_ids
  enable_deletion_protection = false
}
And lastly we define the target group and the listener:
resource "aws_alb_target_group" "default_tg" {
  name        = "${var.project}-tg"
  port        = 7000
  protocol    = "HTTP"
  vpc_id      = var.vpc_id
  target_type = "ip"

  health_check {
    healthy_threshold   = "2"
    interval            = "300"
    protocol            = "HTTP"
    matcher             = "200"
    timeout             = "5"
    path                = "/"
    unhealthy_threshold = "2"
  }
}

resource "aws_alb_listener" "default_listener" {
  load_balancer_arn = aws_alb.default_alb.arn
  protocol          = "HTTP"
  port              = 80

  default_action {
    type             = "forward"
    target_group_arn = aws_alb_target_group.default_tg.id
  }
}
In the target group we can see that we have set port 7000, because this is the one used by Backstage when the application is served by the Express backend.
RDS module
This module is the one that defines the database instance that will be used by Backstage. The database definition is this:
resource "aws_db_instance" "default_db" {
  identifier              = var.project
  name                    = "backstagedb"
  allocated_storage       = var.storage
  storage_type            = "gp2"
  engine                  = "postgres"
  engine_version          = "13.2"
  parameter_group_name    = "default.postgres13"
  instance_class          = "db.t3.micro"
  username                = var.username
  password                = var.password
  multi_az                = false
  skip_final_snapshot     = true
  deletion_protection     = false
  backup_retention_period = 15
  backup_window           = "03:00-04:00"
  maintenance_window      = "wed:04:30-wed:05:30"
  availability_zone       = "eu-west-1b"
  db_subnet_group_name    = aws_db_subnet_group.default_sn.name
  vpc_security_group_ids  = [aws_security_group.rds_instance_sg.id]
}
In addition to the database, we define a dedicated security group that will only allow traffic to RDS from the application’s security group:
resource "aws_security_group" "rds_instance_sg" {
  name        = "${var.project}-rds-sg"
  description = "Allow traffic to DB from default security group"
  vpc_id      = var.vpc_id
  ingress {
    description     = "Connection to DB"
    from_port       = 5432
    to_port         = 5432
    protocol        = "tcp"
    security_groups = [var.default_security_group_id]
  }
}
S3 module
Backstage will be configured to save the documentation on an external provider, in this case an S3 bucket. In this module, we are going to define the bucket as follows:
resource "aws_s3_bucket" "tech_docs_bucket" {
  bucket = var.name
  acl    = var.acl
  versioning {
    enabled = var.versioning
  }
  tags = {
    Name = var.name
  }
}
In addition to the bucket definition, we also block public access to the content like this:
resource "aws_s3_bucket_public_access_block" "tech_docs_bucket_acl" {
  bucket                  = var.name
  block_public_acls       = true
  block_public_policy     = true
  ignore_public_acls      = true
  restrict_public_buckets = true
  depends_on              = [ aws_s3_bucket.tech_docs_bucket ]
}
SSM module
Here we define all the secrets that will be used by Backstage using the Parameter Store. In total there are 8 secrets needed, but here’s just one as an example (as the definition is the same for all):
resource "aws_ssm_parameter" "postgres_host" {
  name  = "POSTGRES_HOST"
  type  = "String"
  value = var.postgres_host
}
All the ARNs of the resources of this module are exported as variables in the output file because we will need them when we are going to define the ECS task.
IAM module
To allow Backstage to access the other services, the ECS task must be launched with an execution role with the necessary permissions. This module does just that, in detail it defines:
- a policy to access the Parameter Store:
resource "aws_iam_policy" "ssm_policy" { name = "${var.project}-ssm-policy" path = "/" description = "Access to Parameter Store variables" policy = jsonencode({ "Version": "2012-10-17", "Statement": [ { "Effect": "Allow", "Action": [ "ssm:GetParameters" ], "Resource": "*" } ] }) } - a policy to access CloudWatch:
resource "aws_iam_policy" "logs_policy" { name = "${var.project}-logs-policy" path = "/" description = "Access to Cloudwatch" policy = jsonencode({ "Version": "2012-10-17", "Statement": [ { "Effect": "Allow", "Action": [ "logs:CreateLogGroup", "logs:CreateLogStream", "logs:PutLogEvents", "logs:DescribeLogStreams" ], "Resource": [ "arn:aws:logs:*" ] } ] }) } - a policy to access the ECR repository:
resource "aws_iam_policy" "ecr_policy" { name = "${var.project}-ecr-policy" path = "/" description = "Access to ECR" policy = jsonencode({ "Version": "2012-10-17", "Statement": [ { "Effect": "Allow", "Action": [ "ecr:BatchCheckLayerAvailability", "ecr:BatchGetImage", "ecr:GetDownloadUrlForLayer", "ecr:GetAuthorizationToken" ], "Resource": "*" } ] }) } - an IAM role to which we associate the policies:
resource "aws_iam_role" "backstage_role" {
  name               = "${var.project}-role"
  assume_role_policy = data.aws_iam_policy_document.ecs_tasks_execution_role.json
}
The policies of this tutorial do not have any restrictions on resources as we used a wildcard (*), in a real environment we recommend that you restrict access only to the resources you need.
We use role attachments to associate policies with the role:
  resource "aws_iam_role_policy_attachment" "backstage-ssm-policy-attach" {
    role       = aws_iam_role.backstage_role.name
    policy_arn = aws_iam_policy.ssm_policy.arn
  }
ECR resource
For the Backstage Docker image we will use an ECR repository that we define like this:
  resource "aws_ecr_repository" "registry" {
  name                 = "${var.project}-image"
  image_tag_mutability = "MUTABLE"
  image_scanning_configuration {
    scan_on_push = false
  }
}
This is the only service that, instead of having a dedicated module, is defined directly in the
main.tffile because it has only one resource.
ECS module
And here we come to the last and most important piece of infrastructure. Here we define a cluster, a service and a task that will launch our container based on the Backstage Docker image. Let’s take a look at all the pieces:
- the ECS cluster:
resource "aws_ecs_cluster" "default_cluster" { name = "${var.project}-cluster" setting { name = "containerInsights" value = "enabled" } } - the CloudWatch log group:
resource "aws_cloudwatch_log_group" "default_log_group" { name = "/ecs/${var.project}" } - the ECS task definition:
resource "aws_ecs_task_definition" "default_task" { family = "${var.project}-task" network_mode = "awsvpc" requires_compatibilities = ["FARGATE"] cpu = 512 memory = 1024 execution_role_arn = var.execution_role_arn container_definitions = jsonencode([{ name = "${var.project}-container" image = "${var.docker_image_url}:${var.docker_image_tag}" essential = true secrets: [ {"name": "POSTGRES_HOST", "valueFrom": var.postgres_host_arn}, {"name": "POSTGRES_USER", "valueFrom": var.postgres_user_arn}, {"name": "POSTGRES_PASSWORD", "valueFrom": var.postgres_password_arn}, {"name": "GITHUB_TOKEN", "valueFrom": var.github_token_arn}, {"name": "AUTH_GITHUB_CLIENT_ID", "valueFrom": var.github_client_id_arn}, {"name": "AUTH_GITHUB_CLIENT_SECRET", "valueFrom": var.github_client_secret_arn}, {"name": "ACCESS_KEY_ID", "valueFrom": var.access_key_id_arn}, {"name": "SECRET_ACCESS_KEY", "valueFrom": var.secret_access_key_arn} ] environment: [ {"name": "APP_DOMAIN", "value": "http://${var.alb_dns_name}"}, {"name": "APP_URL", "value": "http://${var.alb_dns_name}"}, {"name": "BACKEND_URL", "value": "http://${var.alb_dns_name}"}, {"name": "POSTGRES_PORT", "value": "5432"}, {"name": "DEFAULT_REGION", "value": var.default_region}, {"name": "BUCKET_NAME", "value": var.tech_docs_bucket_name} ], logConfiguration = { logDriver = "awslogs" options: { "awslogs-group": "/ecs/${var.project}", "awslogs-region": var.default_region, "awslogs-stream-prefix": "ecs" } } portMappings = [{ protocol = "tcp" containerPort = 7000 hostPort = 7000 }] }]) tags = { Name = "${var.project}-task" } } - and the ECS service:
resource "aws_ecs_service" "default_service" {
  name                               = "${var.project}-service"
  cluster                            = aws_ecs_cluster.default_cluster.id
  task_definition                    = aws_ecs_task_definition.default_task.arn
  launch_type                        = "FARGATE"
  platform_version                   = "1.4.0"
  desired_count                      = 1
  deployment_minimum_healthy_percent = 100
  deployment_maximum_percent         = 200
  scheduling_strategy                = "REPLICA"
  depends_on                         = [aws_ecs_task_definition.default_task]

  network_configuration {
    security_groups  = var.security_group_ids
    subnets          = var.subnet_ids
    assign_public_ip = true
  }

  load_balancer {
    target_group_arn = var.target_group_arn
    container_name   = "${var.project}-container"
    container_port   = 7000
  }
}
Some key points of these resources are worth analyzing. In the task definition we can see how we indicate our Docker image (with a specific tag that can change at each deployment) and how we inject the secrets indicating as a value the ARN of the Parameter Store secrets:
container_definitions    = jsonencode([{
  name        = "${var.project}-container"
  image       = "${var.docker_image_url}:${var.docker_image_tag}"
  essential   = true
  secrets: [
    {"name": "POSTGRES_HOST", "valueFrom": var.postgres_host_arn},
Shortly after we also specify the log group to be used by the container and define the port mapping by specifying port 7000:
logConfiguration = {
logDriver = "awslogs"
options: {
  "awslogs-group": "/ecs/${var.project}",
  "awslogs-region": var.default_region,
  "awslogs-stream-prefix": "ecs"
}
}
portMappings = [{
protocol      = "tcp"
containerPort = 7000
hostPort      = 7000
}]
In the service we connect our ECS container to the load balancer in this way:
load_balancer {
  target_group_arn = var.target_group_arn
  container_name   = "${var.project}-container"
  container_port   = 7000
}
Deploy
Now that we have seen all of Terraform’s resources, we are ready to launch the local container that will be used to deploy the infrastructure. To do this we run:
make terraform-cli
Once inside the container, we run these first two commands:
- terraform init to initialise Terraform and install the providers
- terraform validate to check that all modules and resources are defined correctly
If everything is correct, we are ready to deploy the infrastructure with this command:
terraform apply
Terraform will give us a list of the resources it is going to create and ask for confirmation.
Push Docker image
This is it, the infrastructure is deployed and ready to be used. But there is actually still one step to go, the push of our Docker image! We have just created the ECR registry with Terraform but, checking the ECS logs, we see how the launch of the container fails because it cannot find the Docker image on the repository. To push our image, we first need to login to ECR with this command:
aws ecr get-login-password --region eu-west-1 | docker login --username AWS --password-stdin {{AWS-ACCOUNT-ID}}.dkr.ecr.eu-west-1.amazonaws.com
After logging in, we push like this:
docker push {{AWS-ACCOUNT-ID}}.dkr.ecr.eu-west-1.amazonaws.com/backstage-image:1.0.0
remember to replace the placeholder {{AWS-ACCOUNT-ID}} with our account ID in both commands
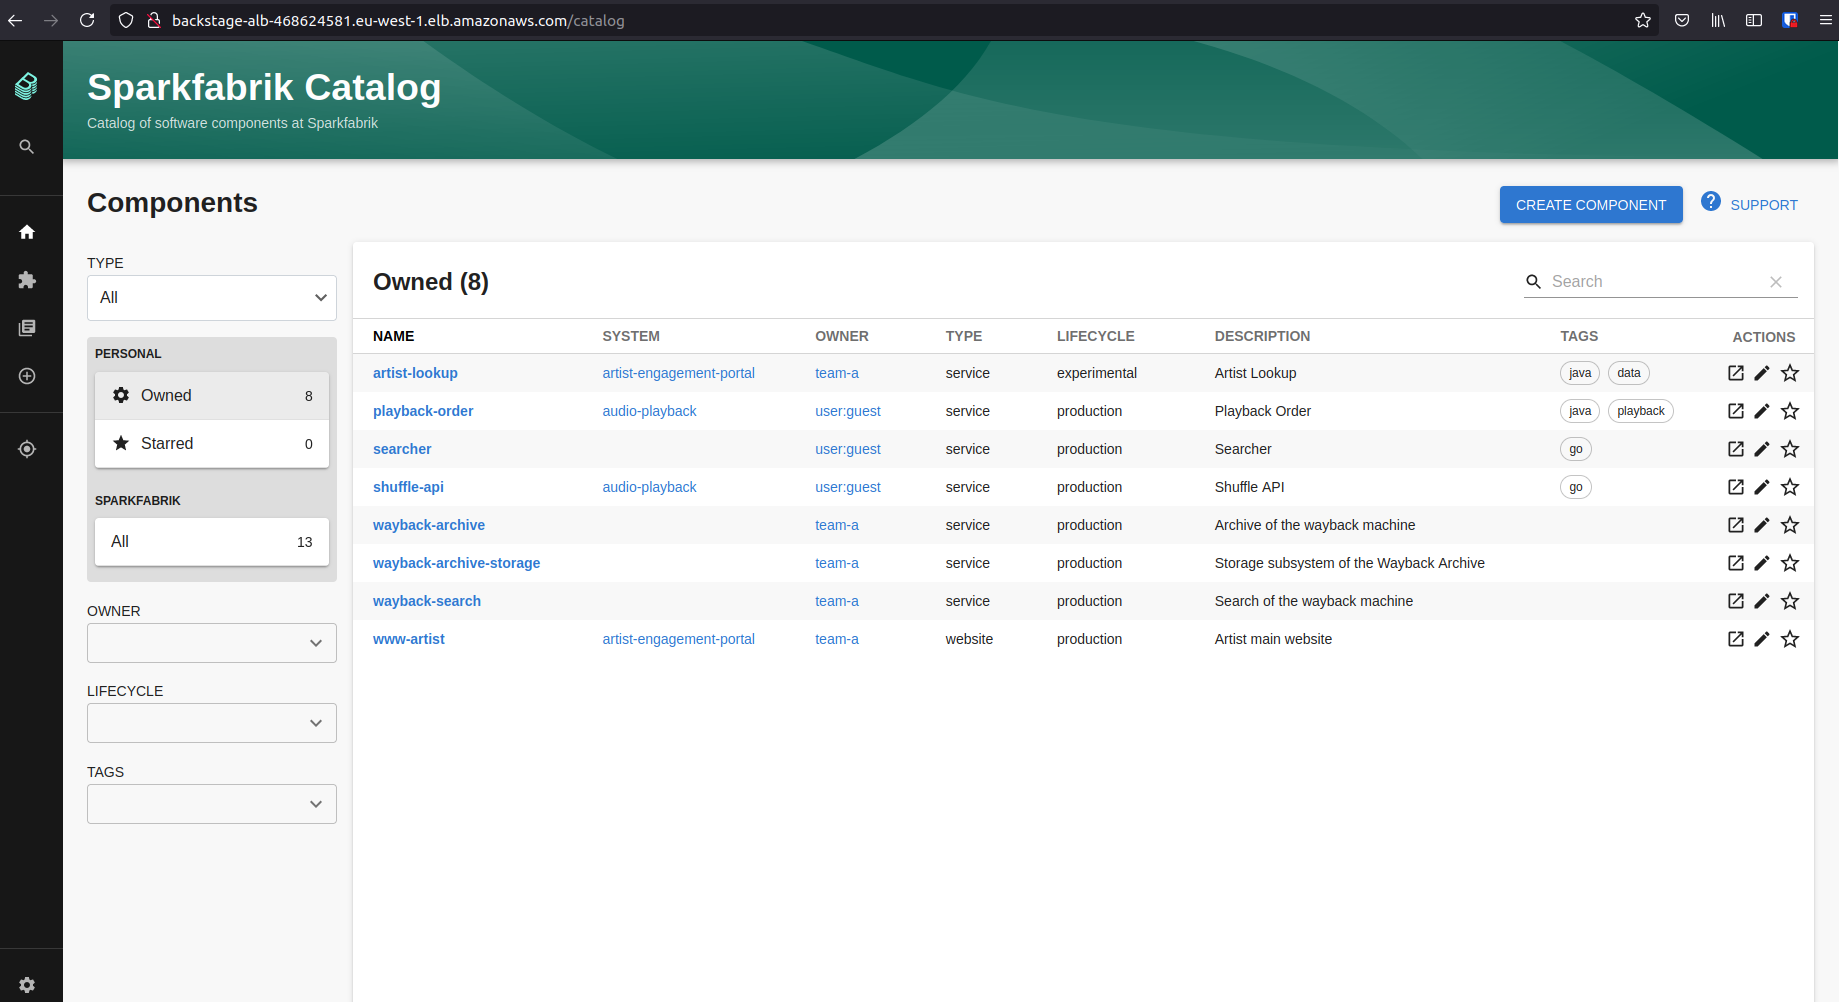
As soon as the image is pushed, in a few minutes ECS will be able to launch our container correctly. At that point, we just need to retrieve the url of our Load Balancer and we will be able to see our Backstage instance up and running!
Conclusion
So we have finished our tutorial, we have an instance of Backstage on AWS and we’re ready to use it. For the purpose of the tutorial we have used the minimum resources needed and have not included some elements that might be needed in real scenarios. For example, we recommend that you use Terraform workspaces if you need multiple environments of the same application. Another improvement that can be applied is to register a custom domain on Route 53 and connect it to the Load Balancer in order to enable HTTPS.
In the end, this is meant to be a starting point that can be easily extended and customised, we hope you enjoyed it! Feel free to contact us if you have any problems and/or doubts about this. ;)
Special thanks go to Marcello Testi and Osvaldo Tulini, two Terraform experts who gave me some useful tips during development.
See you soon!